Create a Preset Profile
When you create a Preset Profile, you can include attributes for locking, automatic renewal status, domain name forwarding, masking, contact information, and nameservers.
Note: You can use Preset Profiles to bulk change contact information. Just add any number of bulk domains to the same Preset Profile and then change contact information for all (see below under Contacts).
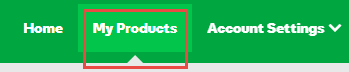
- Log in to your My Products page.
- If you aren't automatically directed there, make sure to select the My Products tab:
- Click Manage All:
- You must be in the List view of your account in order to create a Preset Profile. In the upper right corner, choose List view:
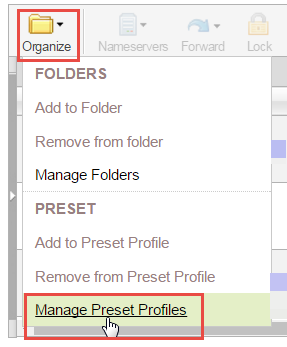
- From the Organize menu, click Manage Preset Profiles.
- Click Add preset profile.
- Enter the profile name and optional description.
- From the Import attributes from list, select one of the following:
- None - Do not import attributes
- Active domain - Import attributes from a specific domain name
- Click Next.
- Select Add for each of the following attributes and, after completing each attribute, click Next:
- Locking - To lock or unlock all domain names in the profile, activate the attribute and indicate the lock state.
- Auto-Renew - To set auto renewal for all domain names in the profile, activate the attribute and indicate the auto renewal state.
- Forwarding - To forward and optionally mask all domain names in the profile, activate the attribute and enter or select the following:
- Forward only - To forward the domain name to a separate URL. see Manually forward or mask your domain or subdomain for information on completing forwarding fields.
- Enable Masking - From the Masking tab, select Enable Masking. see Manually forward or mask your domain or subdomain for information on completing masking fields.
- Nameservers - To update nameservers for all domain names in the profile, activate the attribute and complete the fields. see Change nameservers for my domains for more information.
- Contacts - To add specific domain name contact information for all domain names in the profile, activate the attribute and complete the fields. see Change domain contact information for more information.
- Click Finish.