Change my hosting IP in the Web Application Firewall (WAF)
Note: The instructions below are only applicable if you are using a Website Security Deluxe, Express, or Ultimate plan.
If you change hosting providers, or your hosting provider changes the IP address pointing to your web server, you will need to update your hosting IP address in the Website Security WAF dashboard.
- Log in to your HostingDude.com account. (Need help opening your product?)
-
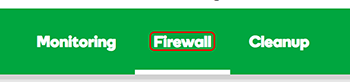
Click on Firewall.
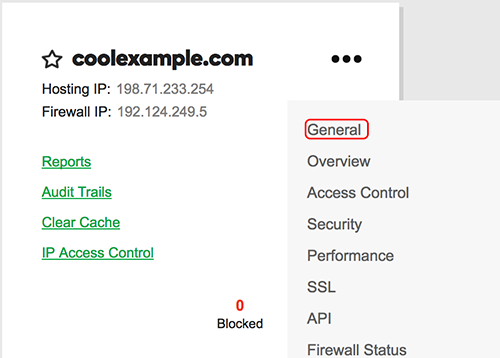
- Click on three dots next to the domain that needs to be directed to the new IP address, and then click on General.
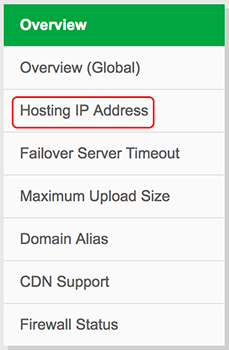
- Click Hosting IP address.
-
Type in the IP address that was provided for you and click add address.

- Once the new address is added, you will need to delete the old IP address. Click the checkbox to the left of the old IP address, and then click Delete Selected.
Once you have deleted the previous IP address, it can take up to 20 minutes for the WAF configuration to update. If the content on your new hosting IP is different than on your previous one, you will need to clear the WAF cache.
Clearing the WAF cache
-
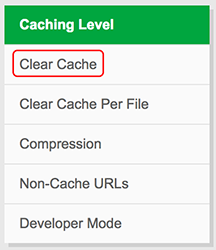
Click on Performance from the Firewall dashboard.

-
Click on Clear Cache.
-
Click the Clear Cache button.