Enable SSH
You can enable SSH in your Managed WordPress account. SSH is a secure method of connecting to your hosting account to upload files, move files, and execute commands with the Linux command line.
Note: SSH access is only available for Deluxe, Ultimate, Developer, and Pro plans for Managed WordPress. SSH access is not available for Managed WordPress Basic plans.
- Log in to your HostingDude.com account.
- In your My Products page, next to Managed WordPress Websites, click Manage All.
- In the WordPress Sites list, click the three-dot icon for the site and select Settings.
- For Basic, Deluxe, Ultimate, or Developer plans: In the Settings section, click the SSH switch so it reads Enabled. You're done!
For Pro plans (available U.S.A. and Canada only), in the Settings section, next to SFTP/SSH access click Manage and continue with the next step.
- Click the SFTP/SSH Access switch to turn it On.
- Enter a New Password, and then click Complete Setup. When we're done, note your Hostname, Username, and Password - you'll use these credentials to log in to other applications (like FileZilla or phpMyAdmin) for other tasks.
Choose the set of instructions for the type of hosting manager you are using.
Note: If you're not sure what type of hosting manager you are using, see What type of hosting manager am I using?.
Gateway
- Click the SSH & SFTP tab.
- Next to SSH Access, click the box to Enable SSH.
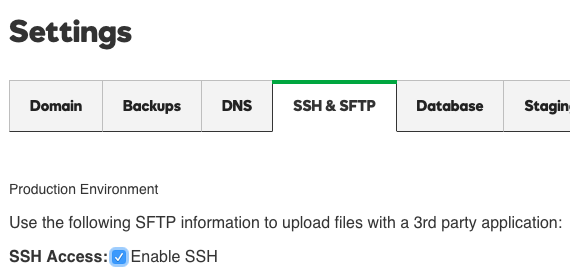
- Click OK to save your changes.
My Hosting
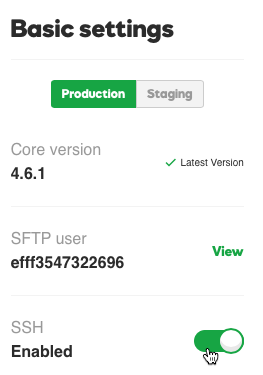
- Click the Settings button under the site you want to make changes to.
- Under Basic settings panel, click the SSH toggle to enable SSH.
More info
- Now that SSH is enabled, you can connect to your Managed WordPress account with SSH, by using your SFTP credentials.