Change gallery settings using Page Builder in WordPress
After adding a gallery to your website, you may want to make some changes to how it's displayed.
- Open Page Builder in WordPress.
- Hover mouse over the gallery you want to change and click the wrench button.

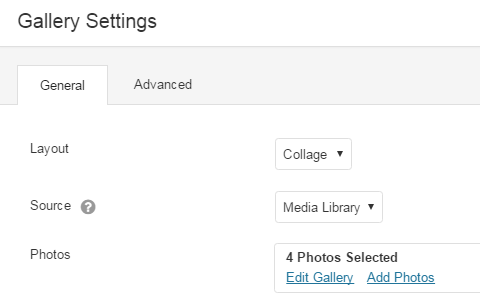
- The Gallery Settings dialog appears, use the Layout to choose Collage or Thumbs.

- From the Gallery Settings dialog box, use the Source to choose Media Library or SmugMug.
If you choose Then Media Library Click in Photos then choose Edit Gallery or Add Photos. SmugMug Insert SmugMug RSS into the Feed URL field. - Click Update Gallery.
- When Gallery Settings dialog box reappears, use the remaining fields as needed.
Setting Description Photo Size You can display your photos in 3 different sizes; large, medium and small. Photo Spacing You have the capability to space your photos in pixels. Show Captions You have three choices to display you photo captions; on hover, below the photo or not at all. Click Action Photo click actions available are Lightbox or Photo Link. - Click Save.
- Click Done, located on the top-right corner.
- Click Publish Changes. If you do not want these changes to go live yet, click on Save the Changes and Exit option.